Contents
Support Managers
|
Xartashah
English
| online |
|
Aerielle Kiyori
English
| offline |
|
Alexander Pixels
English
| offline |
|
Amyalka
English
| offline |
|
Chardaedae16
English
| offline |
|
Glaznah Gassner
English, Russian
| offline |
|
Justina Mcminnar
English
| offline |
|
Makaylah Wurgle
English
| offline |
|
Rehnaeaislinn
English
| offline |
|
Sammyredfire
English
| offline |
|
shorty McKeenan
English
| offline |
| show offline managers | |
| English, Russian |
How to Add a group
| Group Services |
The following shows you step-by-step instructions on how to list a group with smartbots.
Why do I need this
To use most of the features provided by SmartBots, you must first list your Second Life group with SmartBots.
After adding a group you can send notices, view group chat and use other SmartBots services.
How to add a group
- Log in to SmartBots account.
- At the top of your account dashboard there will be 3 check boxes, please ensure that all 3 are checked and refresh the page:

- Locate the link that says "Add a new group to manage":

- You will then be prompted with a choice to either use the system bot or personal bot:

- System bot is bot owned by SmartBots. You can use system bot to manage your group.
- Personal bot is your own bot (SL avatar)
Click on the tabs "A" and "B" below to see details of how to add a group using each method:
- A. If you are using system bot
- B. If you are using personal bot
The following steps apply to how to add a group using the system bot:
5. Click "Click to use system bot"
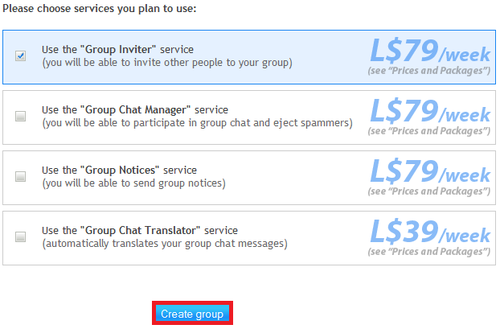
6. Enter your group name, select your bot and select the appropriate check boxes and then click "Add Group":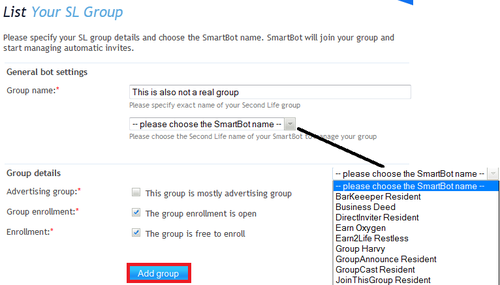
Congratulations! You have successfully added a group using the system bot.
Next Steps
For the group to start functioning the following steps need to be completed:
- You need to pay for the group: Instructions Here.
- You need to invite the bot into the group with a role that has the abilities that match the service you selected (Inviting the bot into an officer role is always the easiest option)
Once these steps are completed the group has begun to work.
Additional Steps
For the Group Inviter Service an additional step is required: You will need to rez an Interface device available here
The following steps apply to how to add a group using the personal bot (your bot should have already been created and should be a standard bot, it should also already be in the group):
5. Click "Click to use personal bot"
6. Select the bot you want to use from the list: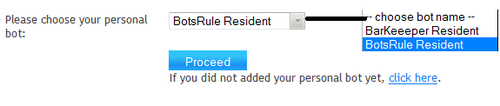
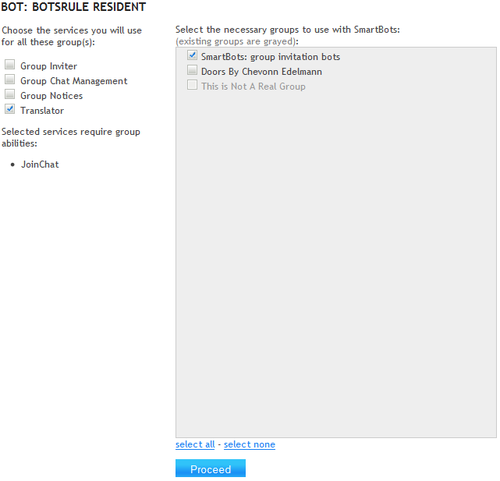
9. Your group has been listed successfully! It will now ask you to select if the group is a spam group.
Your group subscription will expire when your personal bot expires. You can read how to change the active services on a group here.
Additional Steps
For the Group Inviter Service an additional step is required: You will need to rez an Interface device available here
Abilities
The abilities needed for the bot to perform optimally differ with each service, it is recommended that you place the bot in an officer role as it contains most of the abilities the bot will need assuming it hasnt been changed.
A list is provided below:
- Group Inviter - Invite, Assign members to Assigners role (if inviting to a custom role)
- Group Chat Management - Join Group Chat, Moderate Group Chat, Eject from group
- Group Notices - Send notices
The abilities required may differ if additional services are used.